12 Tips for DIY Roof Building
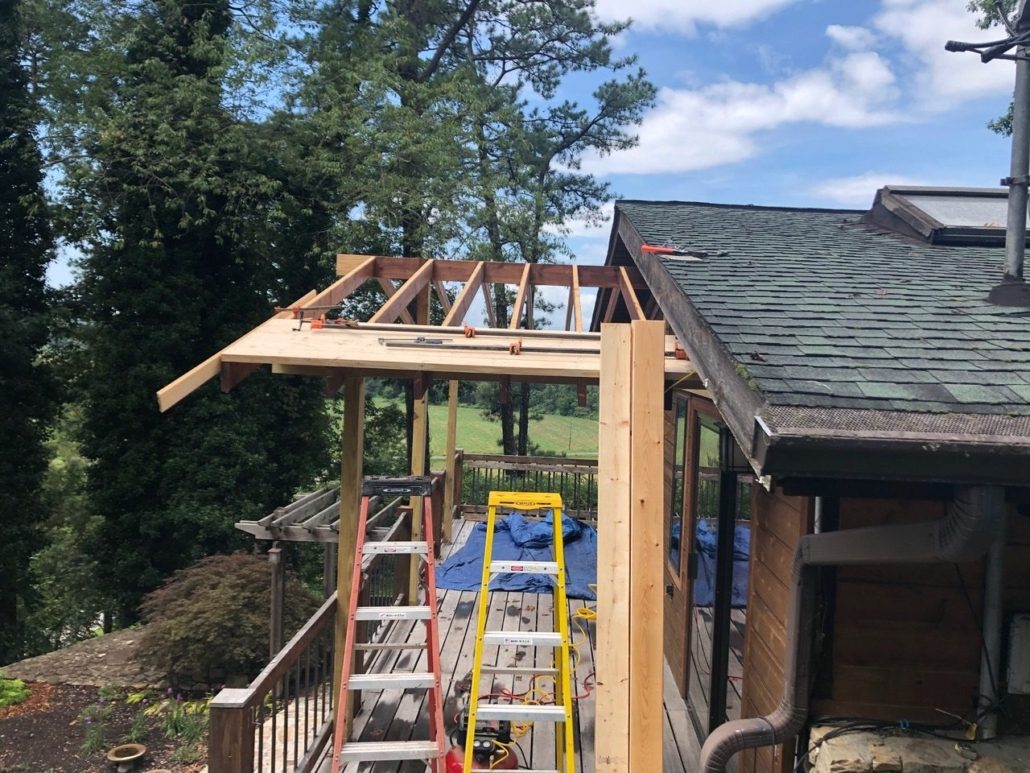
As you may recall from an earlier column, once I had completed the excavation and preparation of the new planting beds in front of our house, I turned the plant selection over to Leigh Ann and got out of her way. I turned my attention to our existing second-floor deck, which faces south and gets blasted with sunlight. My solution was to construct a simple pitched roof over the deck, giving us the opportunity to use it on both sunny and rainy days.

I trained under a carpenter during my high school summers and worked as a roofer all four years of college, so undertaking a simple post-and-beam roof system over our 8’ x 30’ deck was pretty straightforward. Along the way, I started jotting down some lessons I had learned – and continue to learn – that I thought I would offer to anyone who is thinking about starting a small carpentry project.
- Start each project with a small spiral notebook where you can make sketches, write down dimensions, and make lists of materials you need.
- When in doubt at the store, buy two. It is always easier to return an item at your convenience than it is to make an emergency trip back to get the other size.

- Never assume the end of any board you buy is square. Use a framing square and saw to square up one end, then measure from it and cut the board the length you need.
- Speaking of cutting, the most dangerous tool is a dull one. It forces you to apply undue pressure, which can cause a saw blade to kickback or a drill bit to snap. Start each project with sharp tools – and clean safety glasses next to each one of them.
- Place a box beside your sawhorses so you can toss wood scraps into it as you cut each board. Otherwise, you’ll be apt to stumble over your cut ends as you are carrying your board away.

- Measure twice, saw once. Or as someone lamented, “I cut it twice and it’s still too short.”
- Speaking of measuring, buy a few extra tape measures, placing them where you will need them rather than running back and forth looking for your only one.
- It only takes a minute with a belt sander to erase the marks and scuffs on lumberyard boards, turning them into boards that look more like furniture grade wood.
- Screws always hold better than nails. Use a nail or two to tack a board in place, but use screws to keep it there permanently.
- Never drive your first few nails completely into any board. You want to be able to step back, take a look at it, and, if necessary, easily pull out the nails to reposition the board.
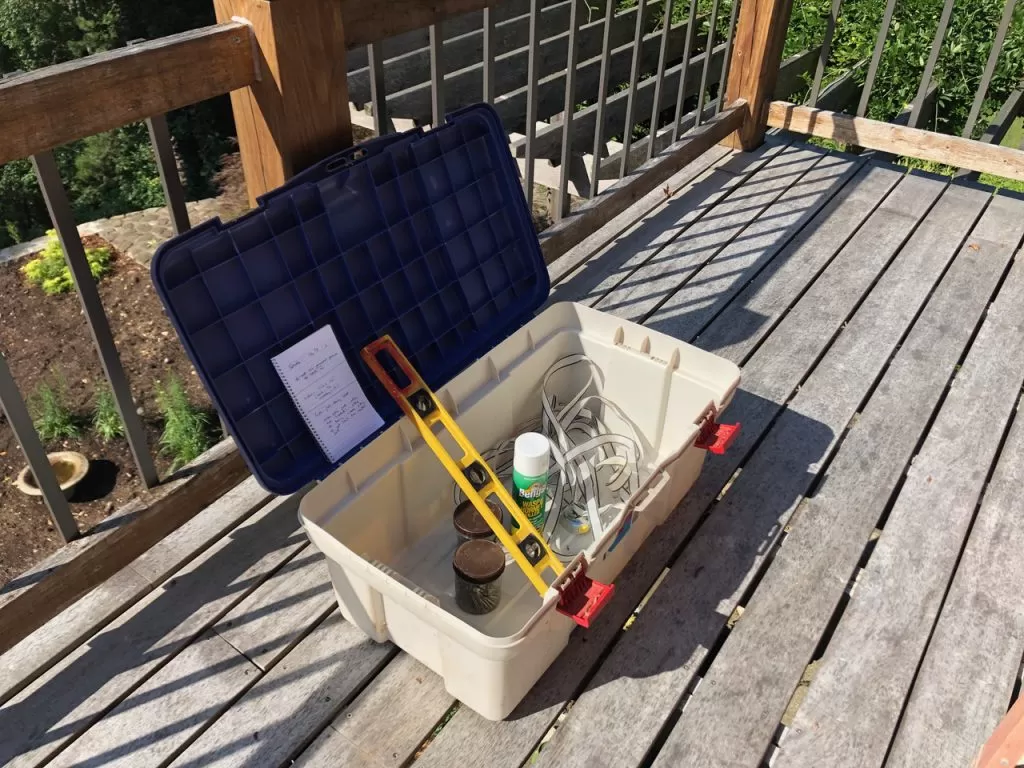
- If you leave a hammer on top of a stepladder, it will fall. If you leave a saw on the floor, you will trip over it. Buy an inexpensive, plastic tub to store your tools while you are working.
- You don’t have to hire extra help or wait for your friend or partner to get home to hold the other end of a board – provided you have some woodworking clamps nearby. I built my entire roof, including 10’ boards and posts, without any help. Instead, I used bar clamps. And they don’t drink all your beer or talk on their phone when you need them.
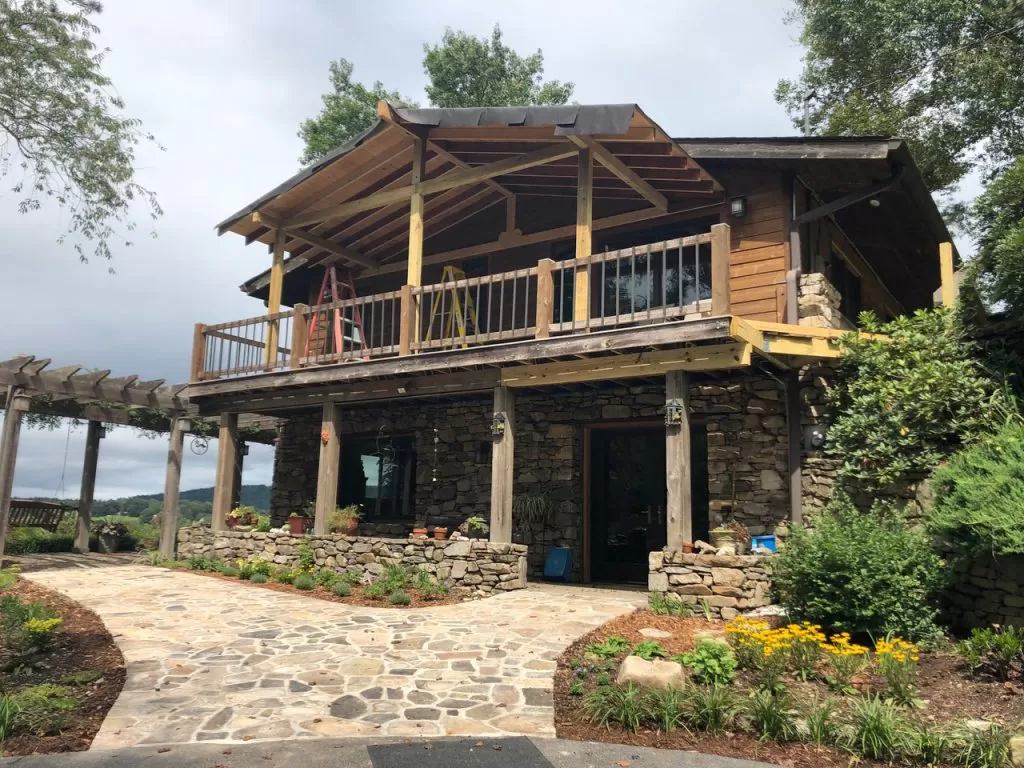
Next step for me will be shingles, the last section of railing, and a ceiling fan to keep the insects away!
Until next week,
“It is just as desirable to build a chicken house as to build a cathedral.” – Frank Lloyd Wright
Bruce